Overview
With Play to Xcode, your Play project is no longer just a prototype. You can use Play’s SDK (software development kit) to export your project’s styles, assets, components, pages, and variables directly into Xcode as a Swift package. Everything will look and behave 1:1 with how you designed it in Play. You can add the Swift package to a new or existing project in Xcode, and you can always update the package based on new changes in Play. We’re making it easy to keep your design tool and code base in sync.Components, pages, and variables each count as an “item” in the export. Assets and styles are included in the export and do not count as items.
Publishing to a New Xcode Project
Starting from scratch? Create a new Xcode project starting with Play’s SDK.Step 1: Configure Your Package
Export As
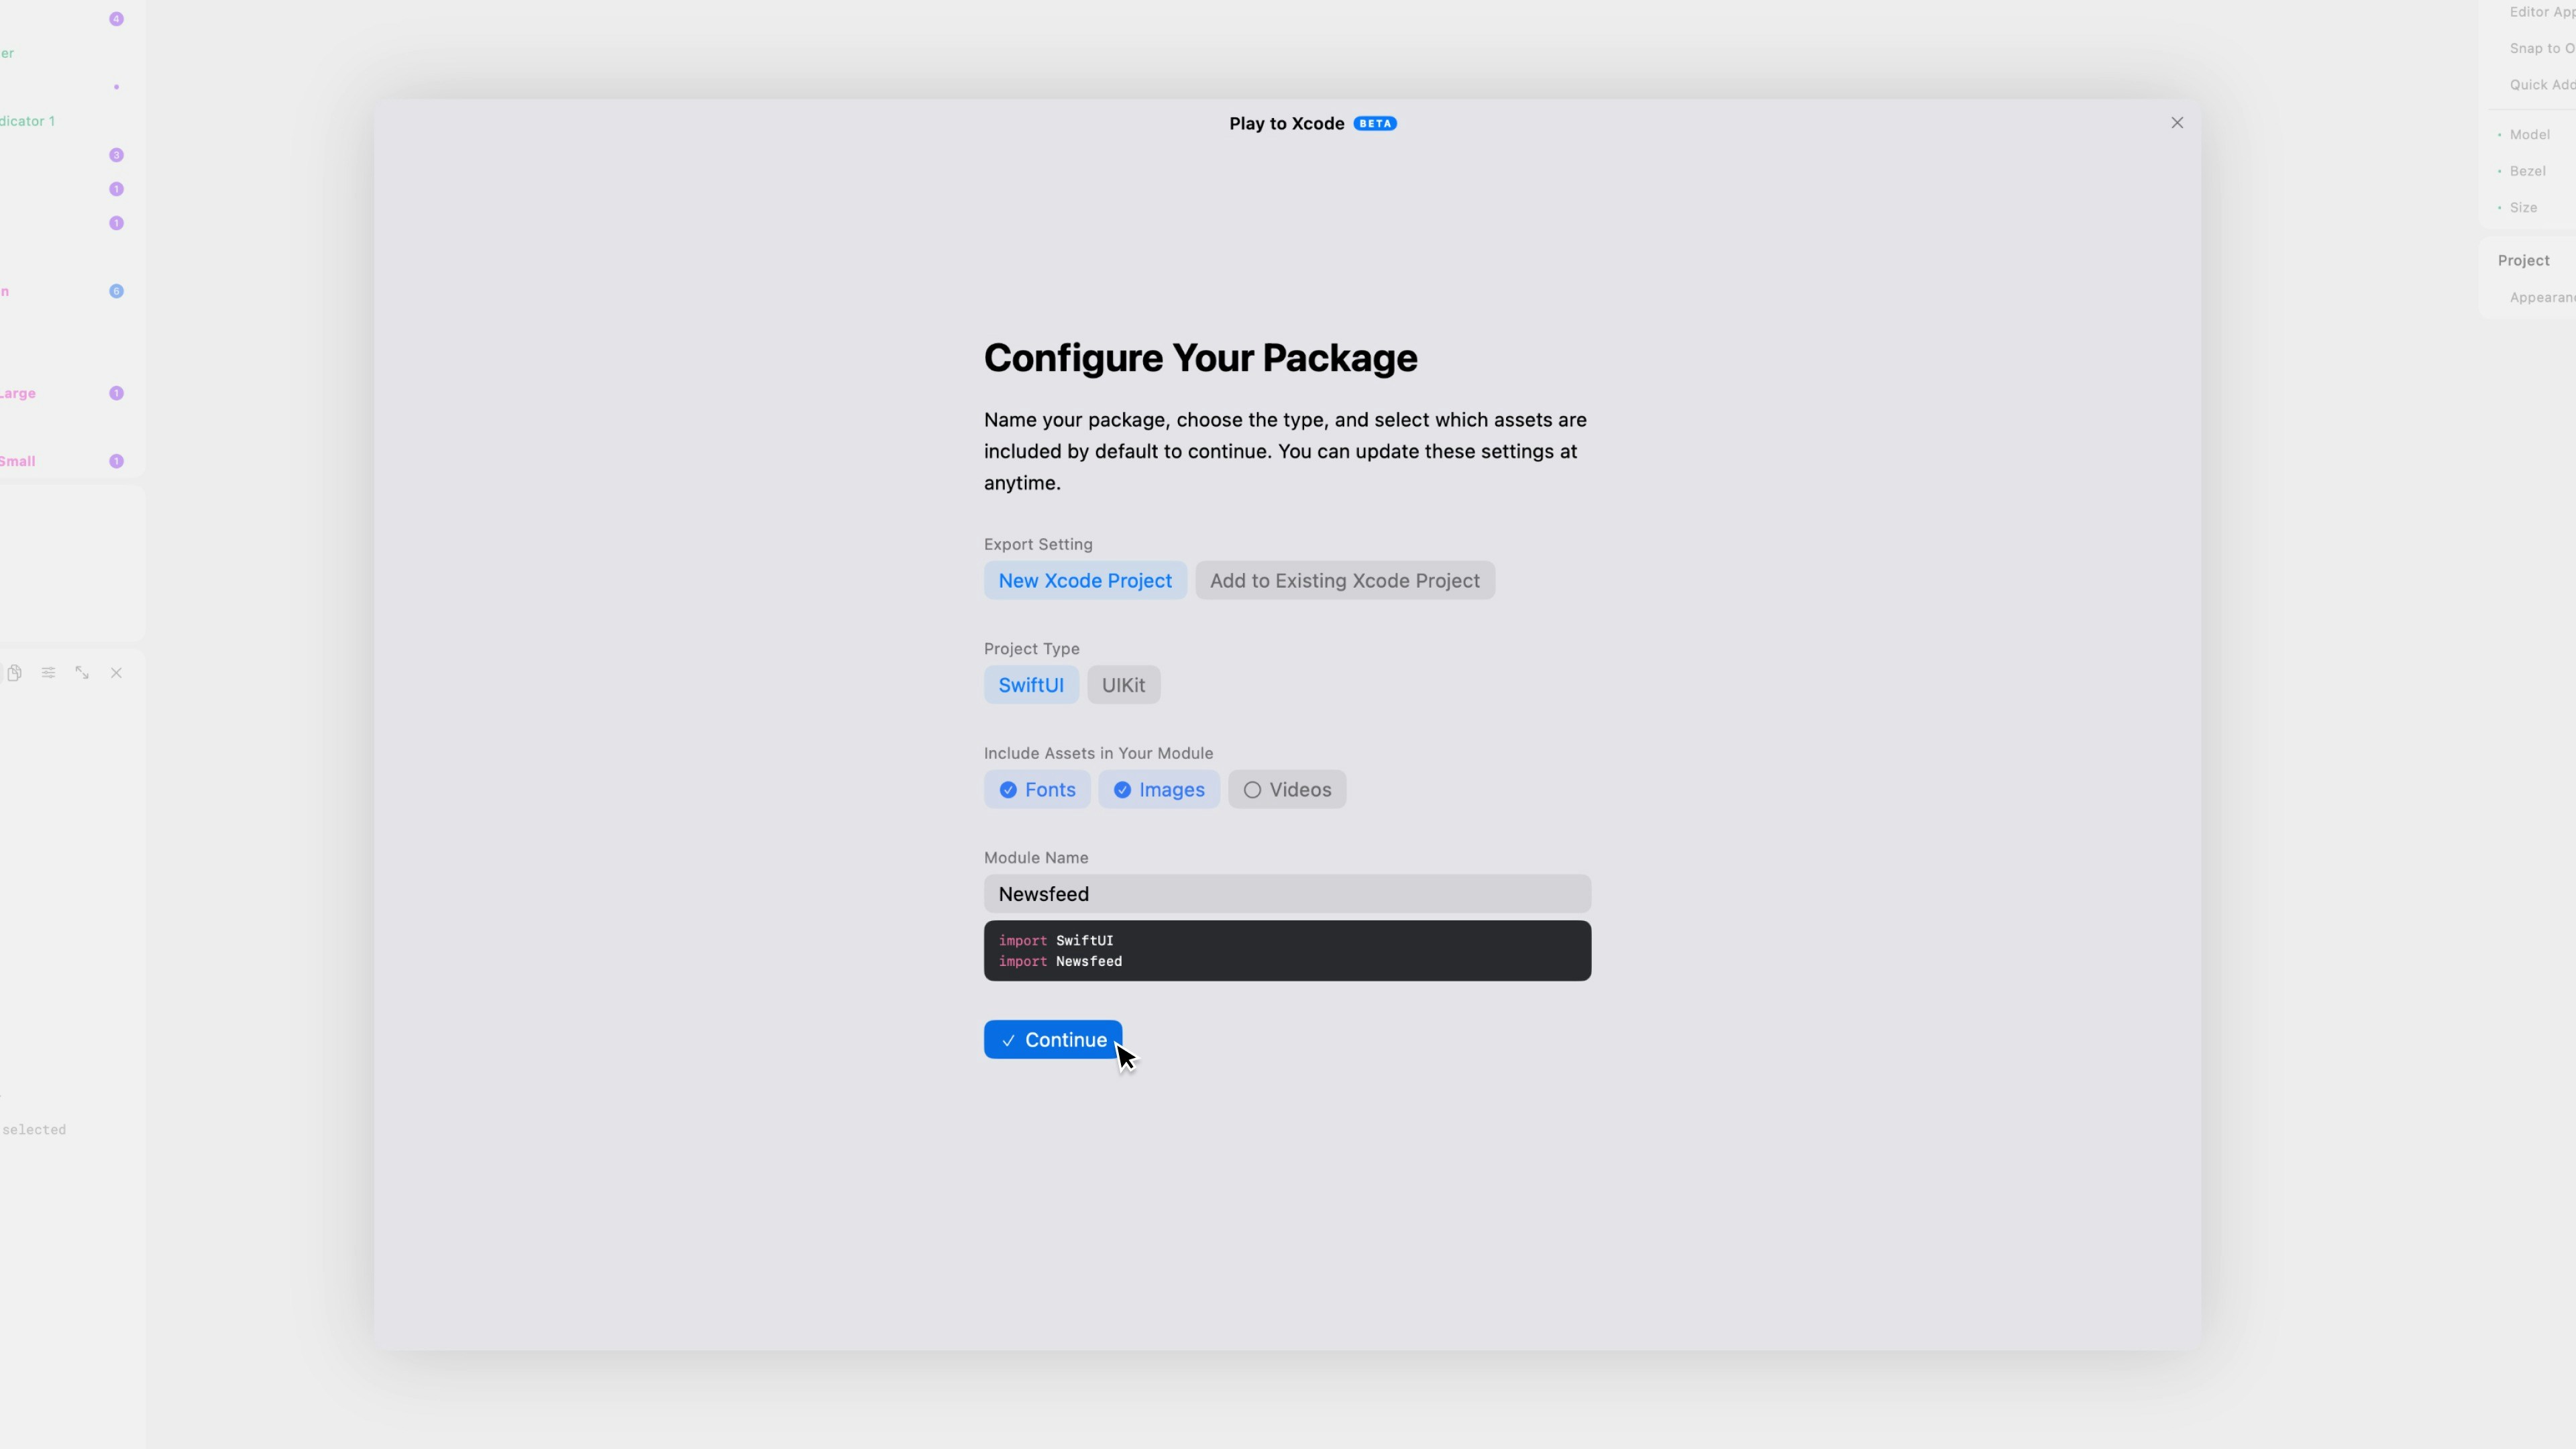
Select “New Xcode Project”.Project Type
Choose if the Swift package should be SwiftUI or UIKit.Include Assets in Your Module
Choose to include font, image, and/or video type assets from the Play project. You can choose specific assets later.Module Name
Enter a name for the module. It cannot be the same as the project name. Implement the module in Xcode with the following syntax:Step 2: Review Names and Implementation
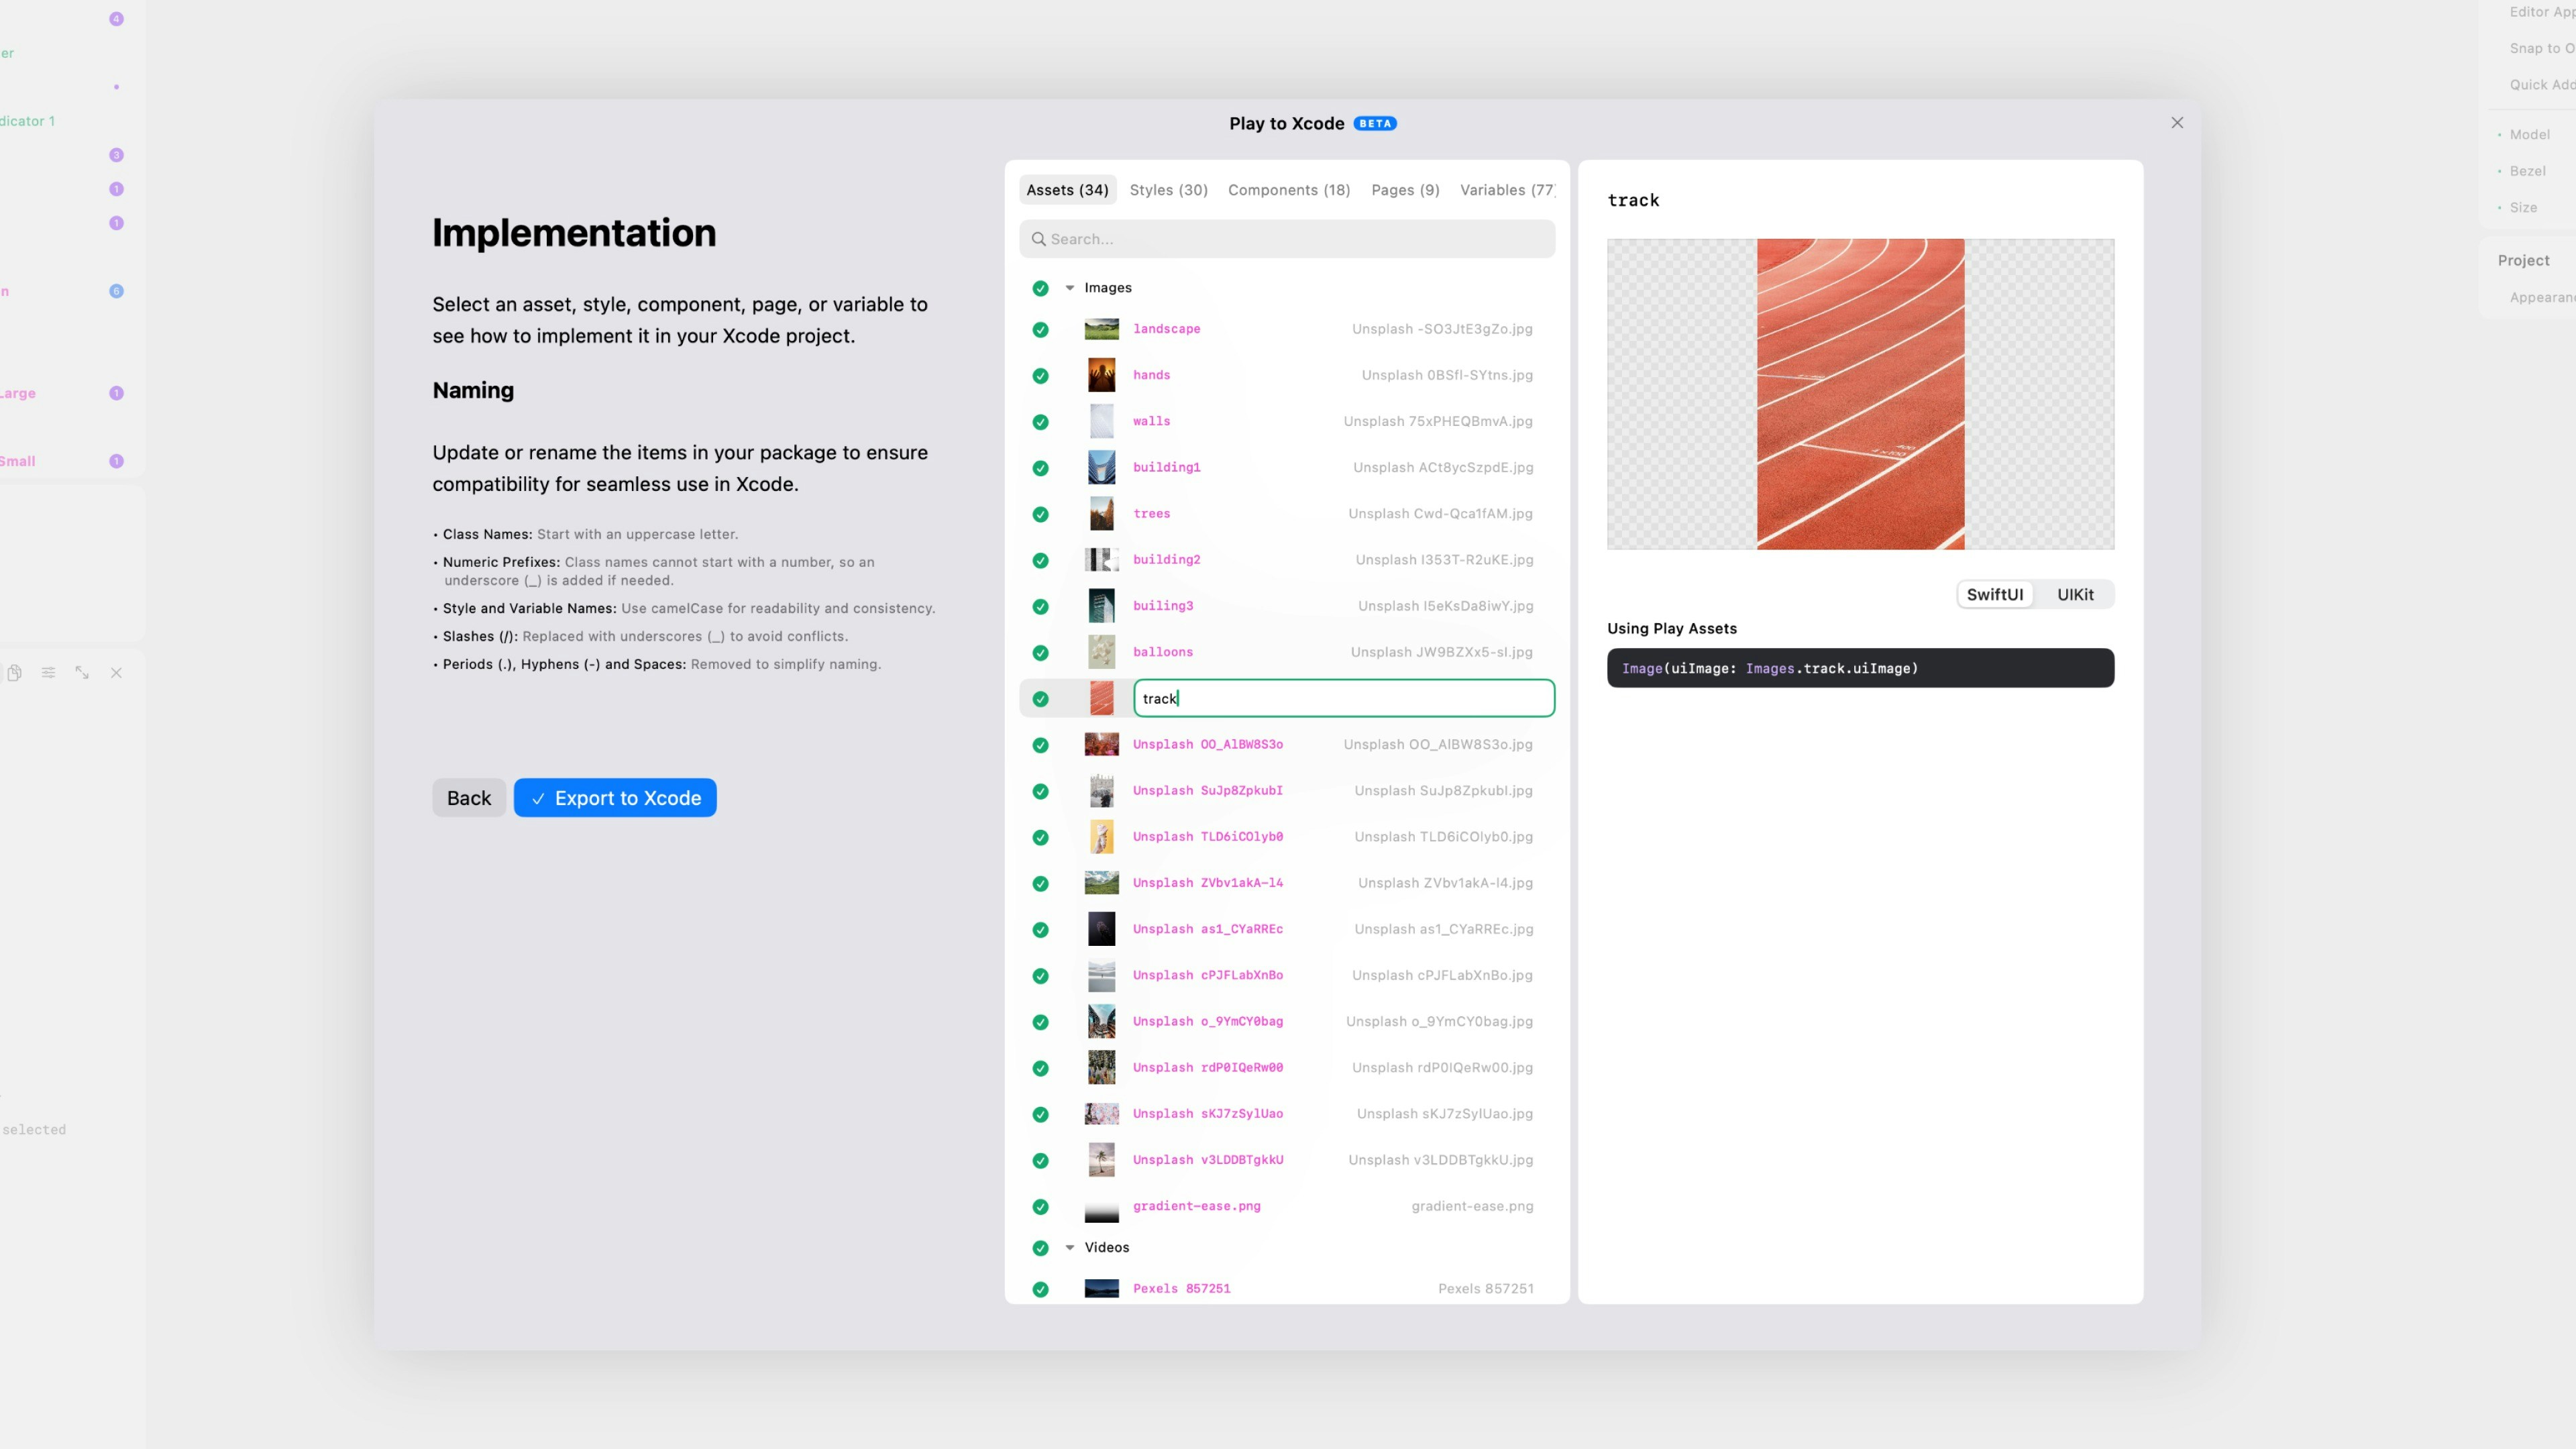
Renaming Best Practices
- Class Names should start with an uppercase letter. They cannot start with a number, so we’ve added an underscore (_) when necessary.
- Style and Variable Names should start with a lowercase letter and follow camelCase.
- Slashes (/) cause conflicts, so they should be removed or replaced with an underscore (_).
- Periods (•), Hyphens (-) and Spaces should be removed to simplify naming.
Step 3: Export to Xcode
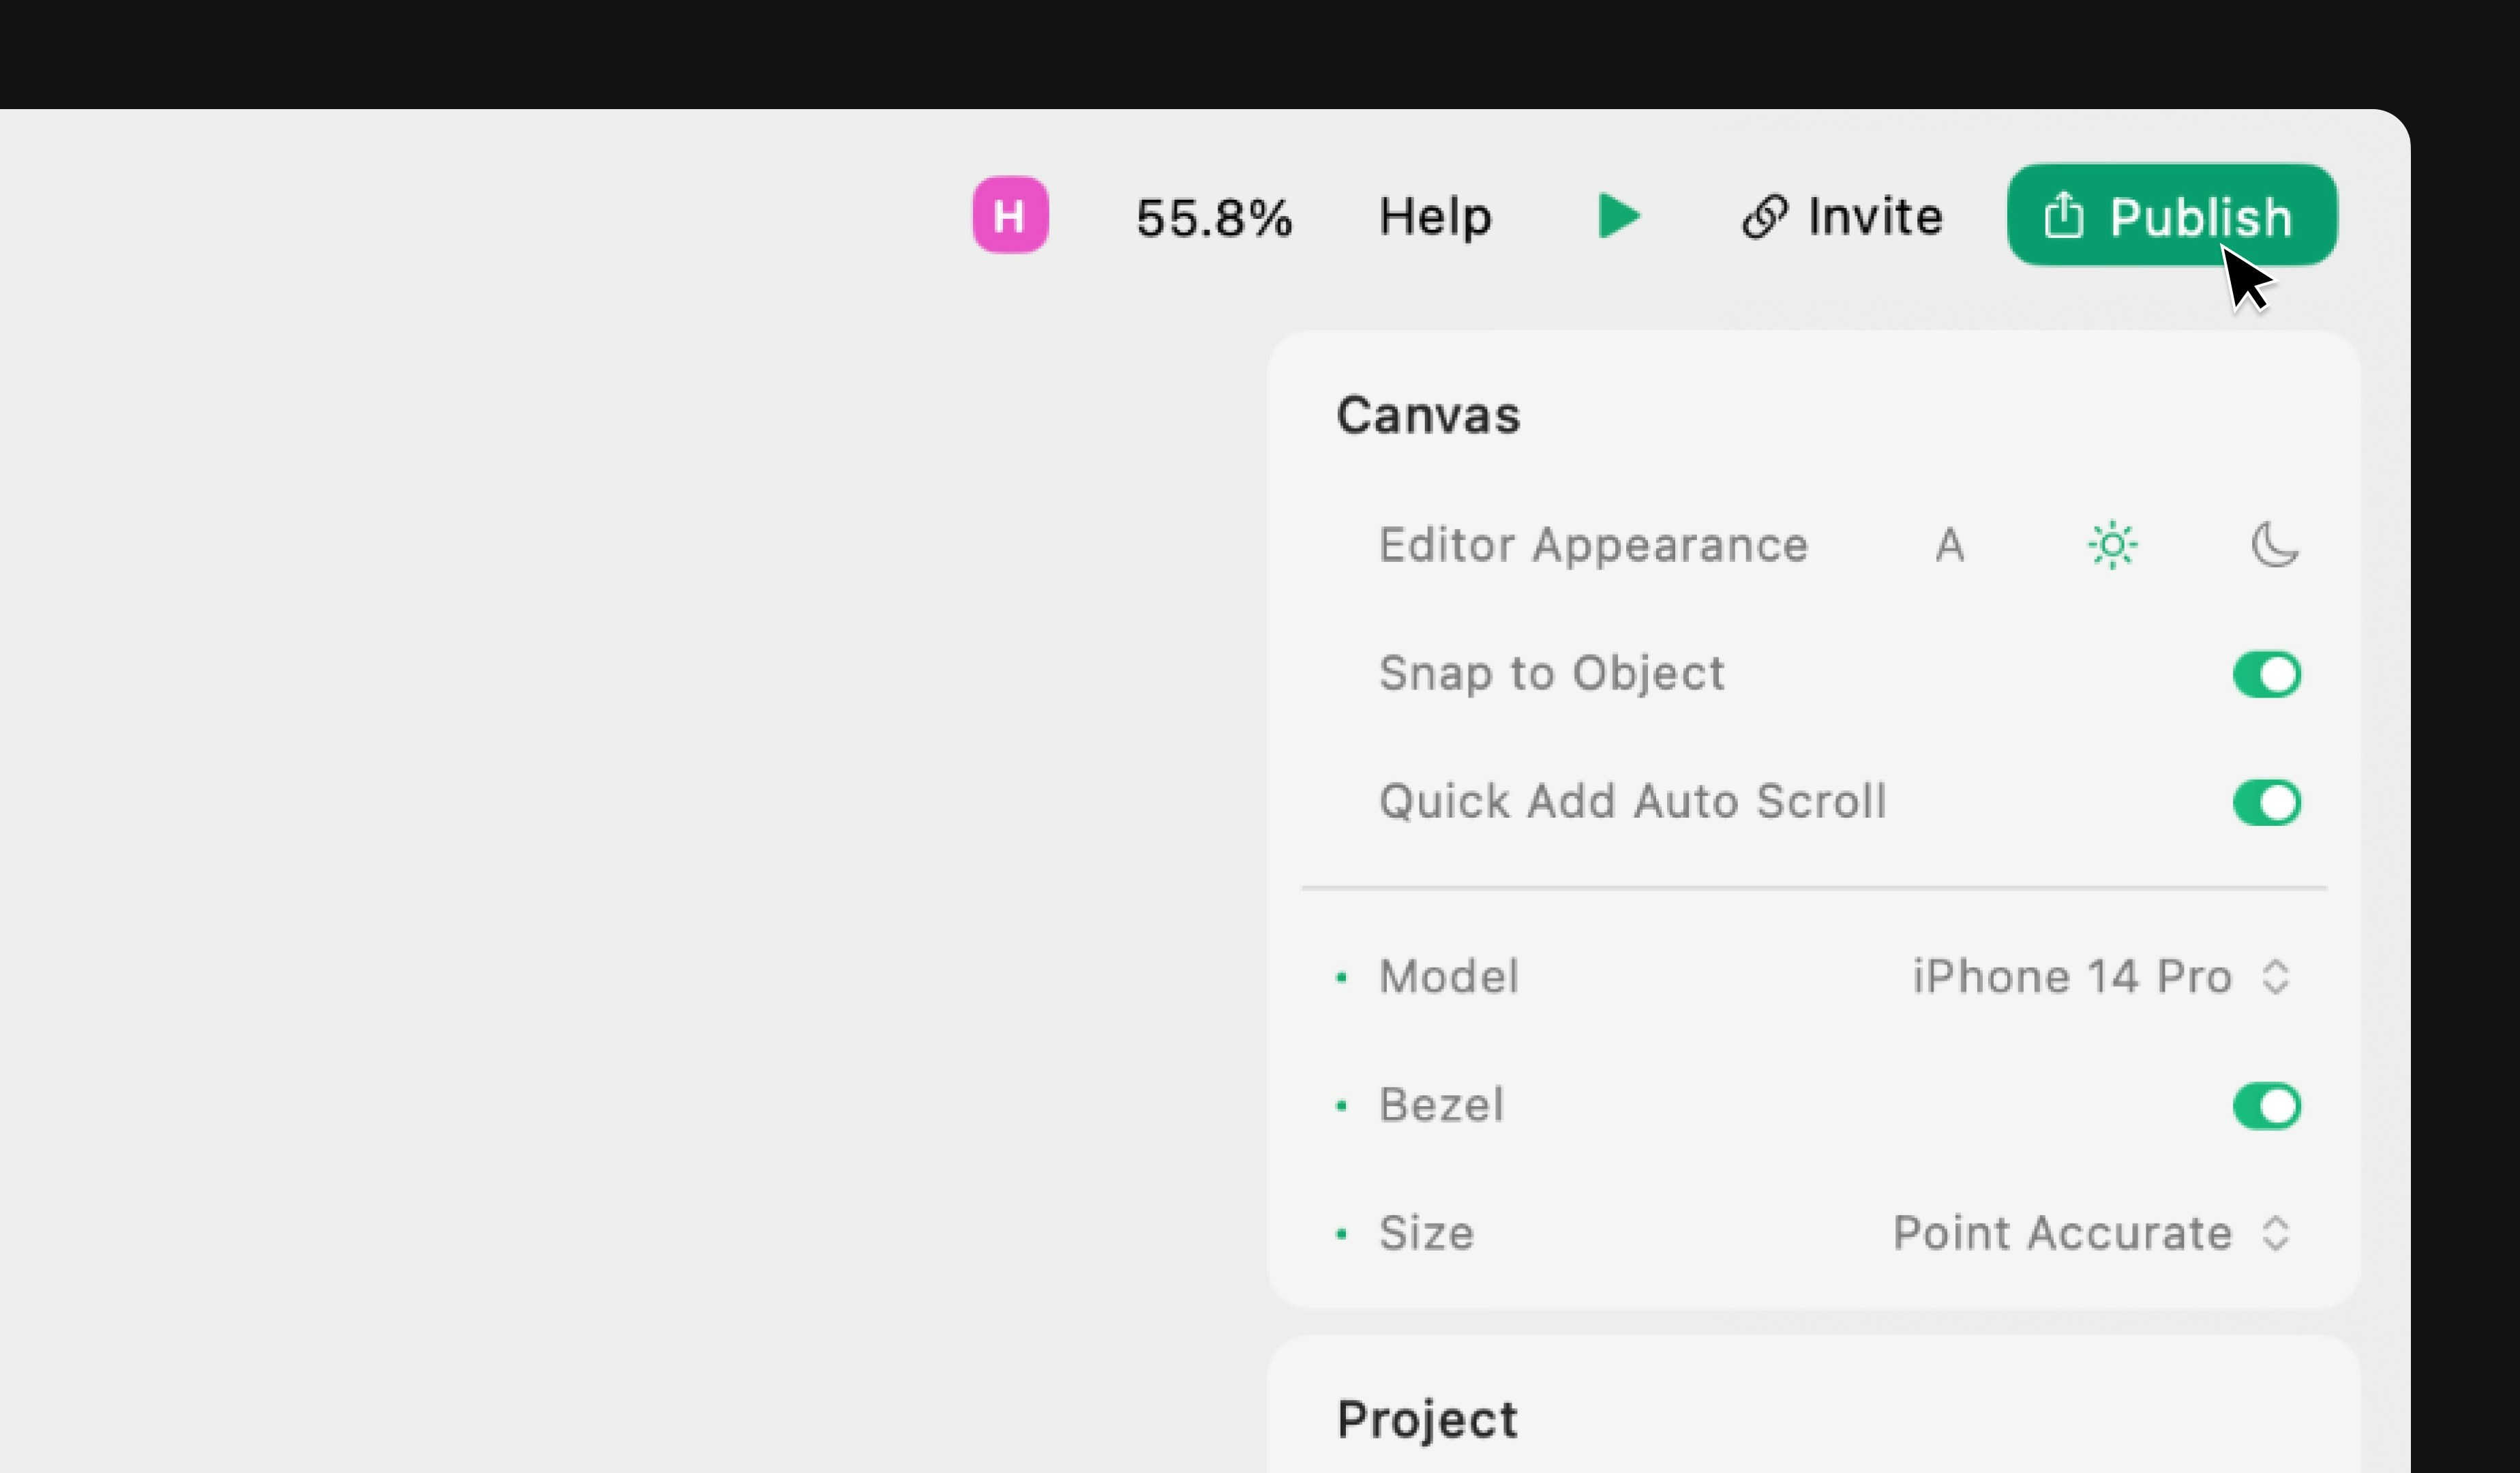
When you’re ready, click “Export to Xcode” to begin the export. You’ll see the download status at the bottom of the macOS app.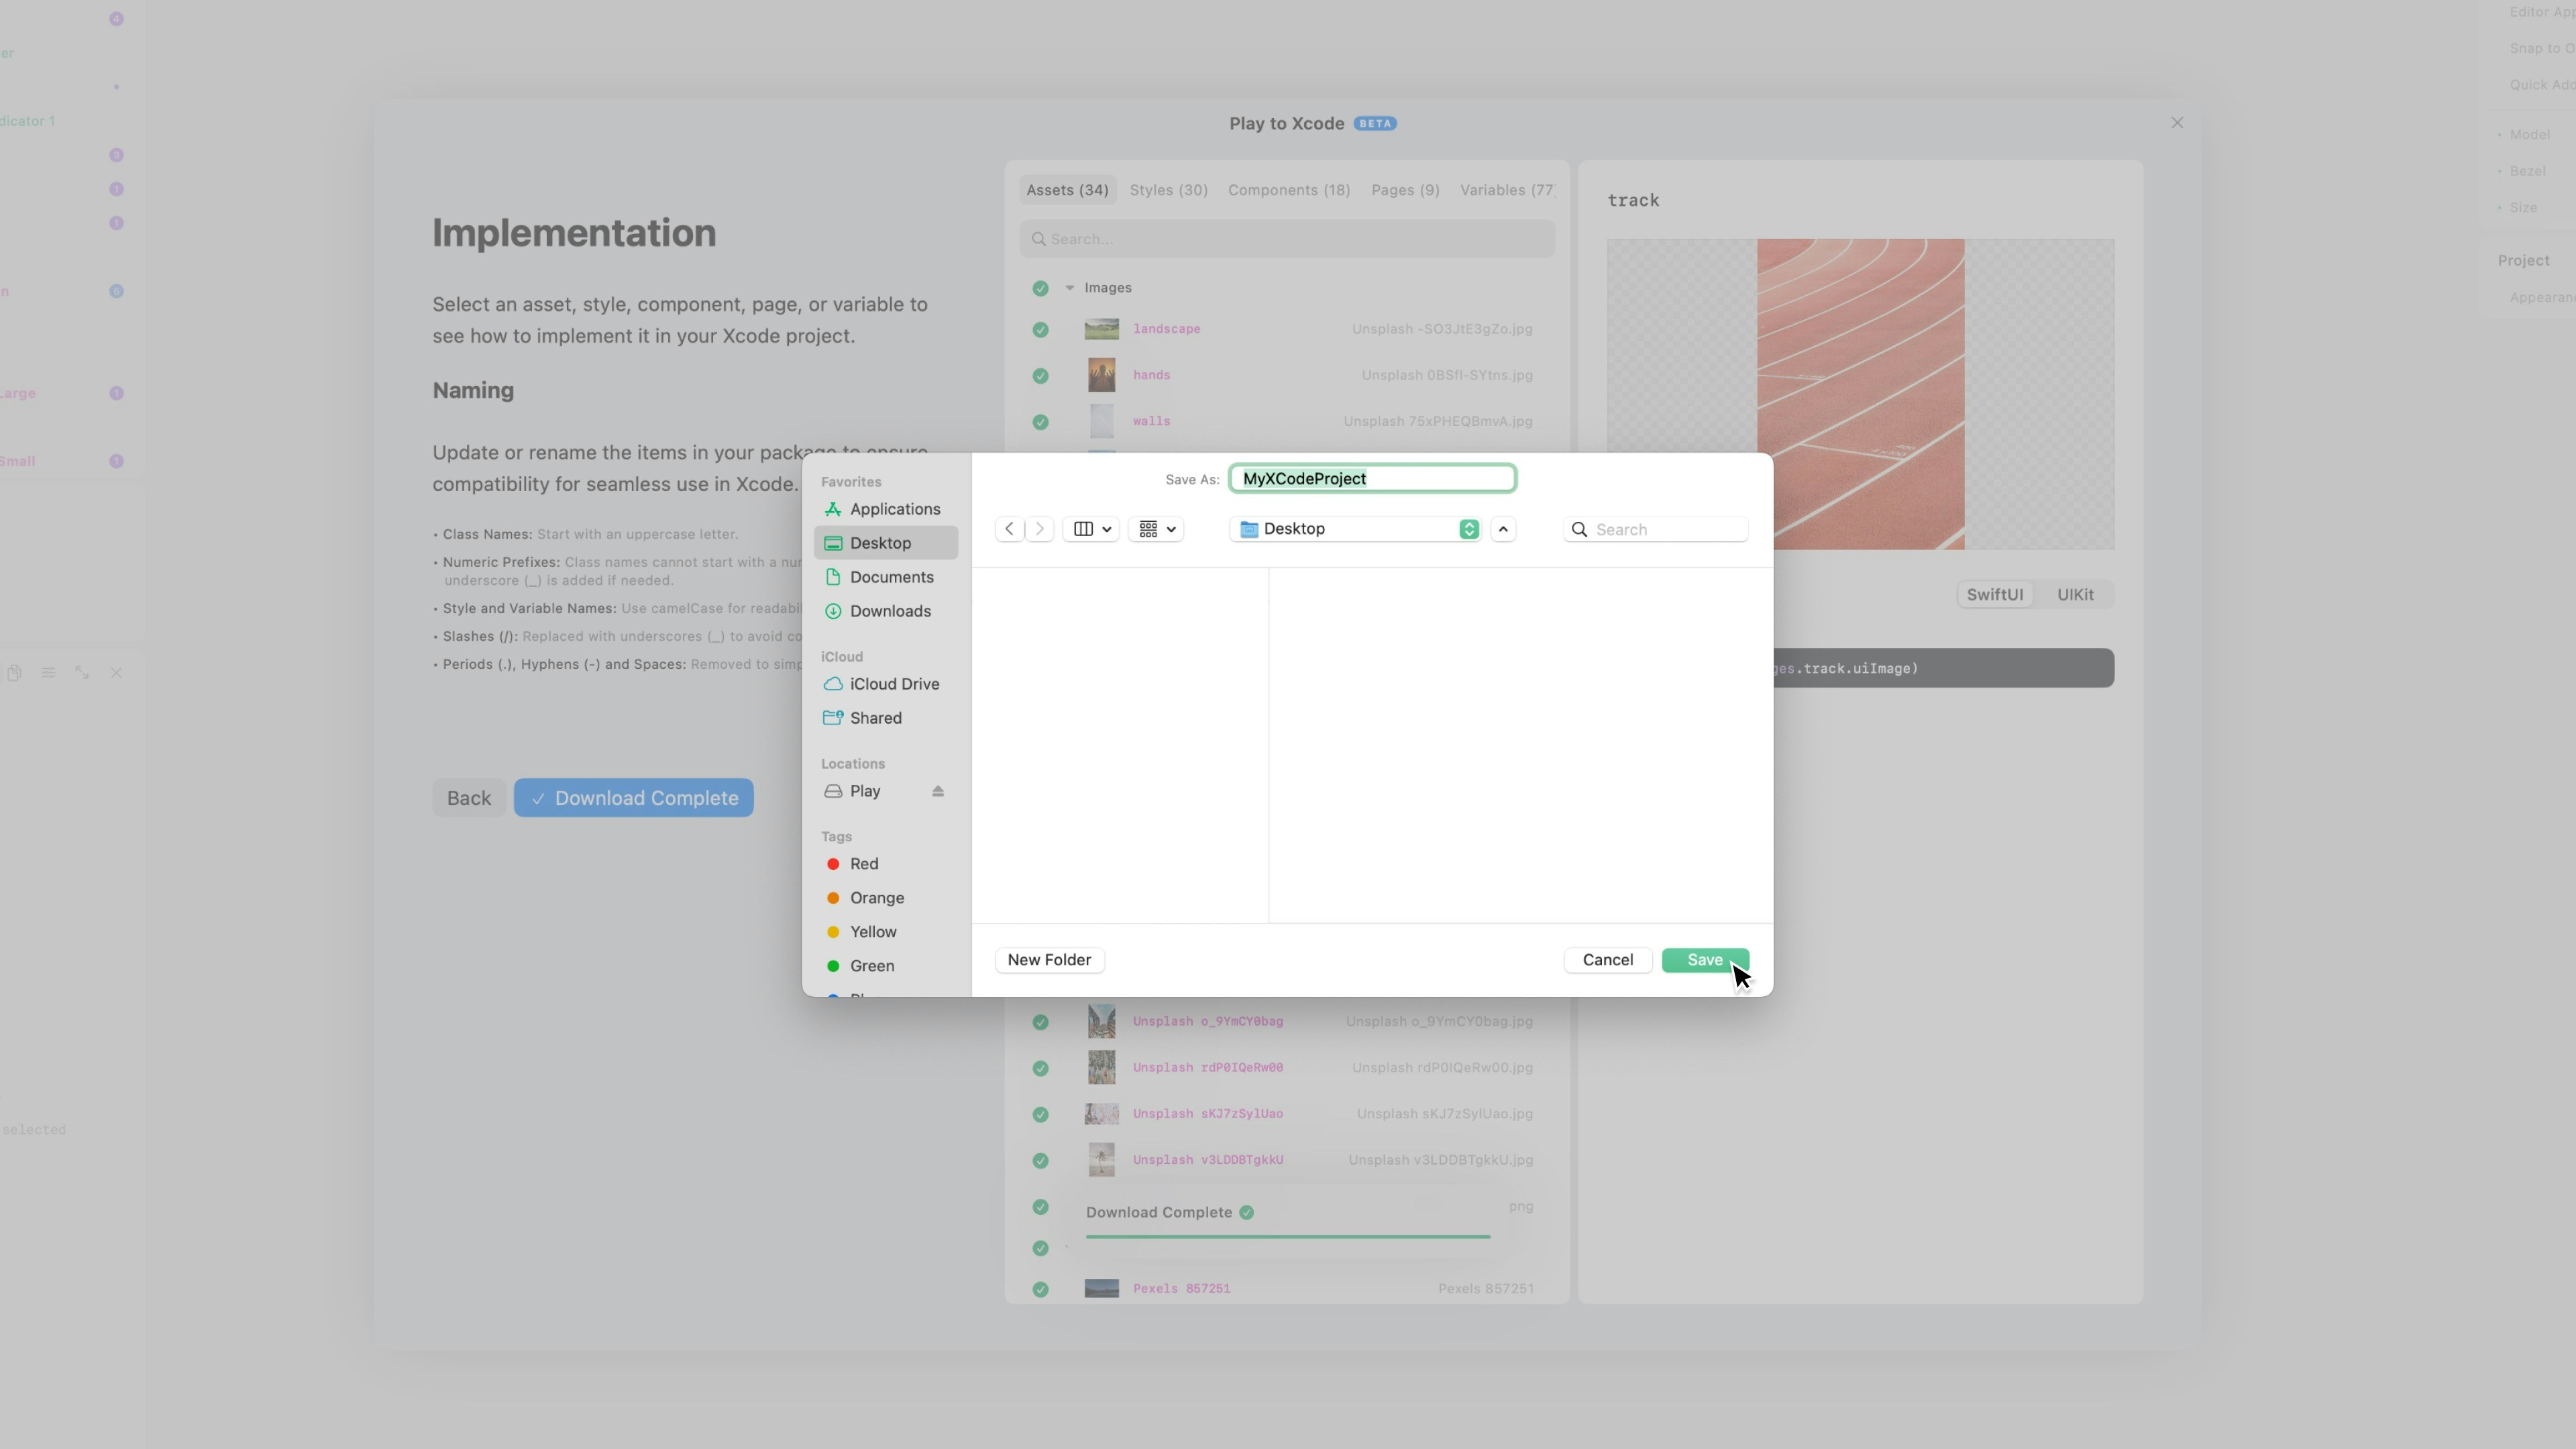
Publishing to an Existing Xcode Project
Already have a code base in Xcode? Add Play’s SDK to your existing Xcode project.Step 1: Configure Your Package
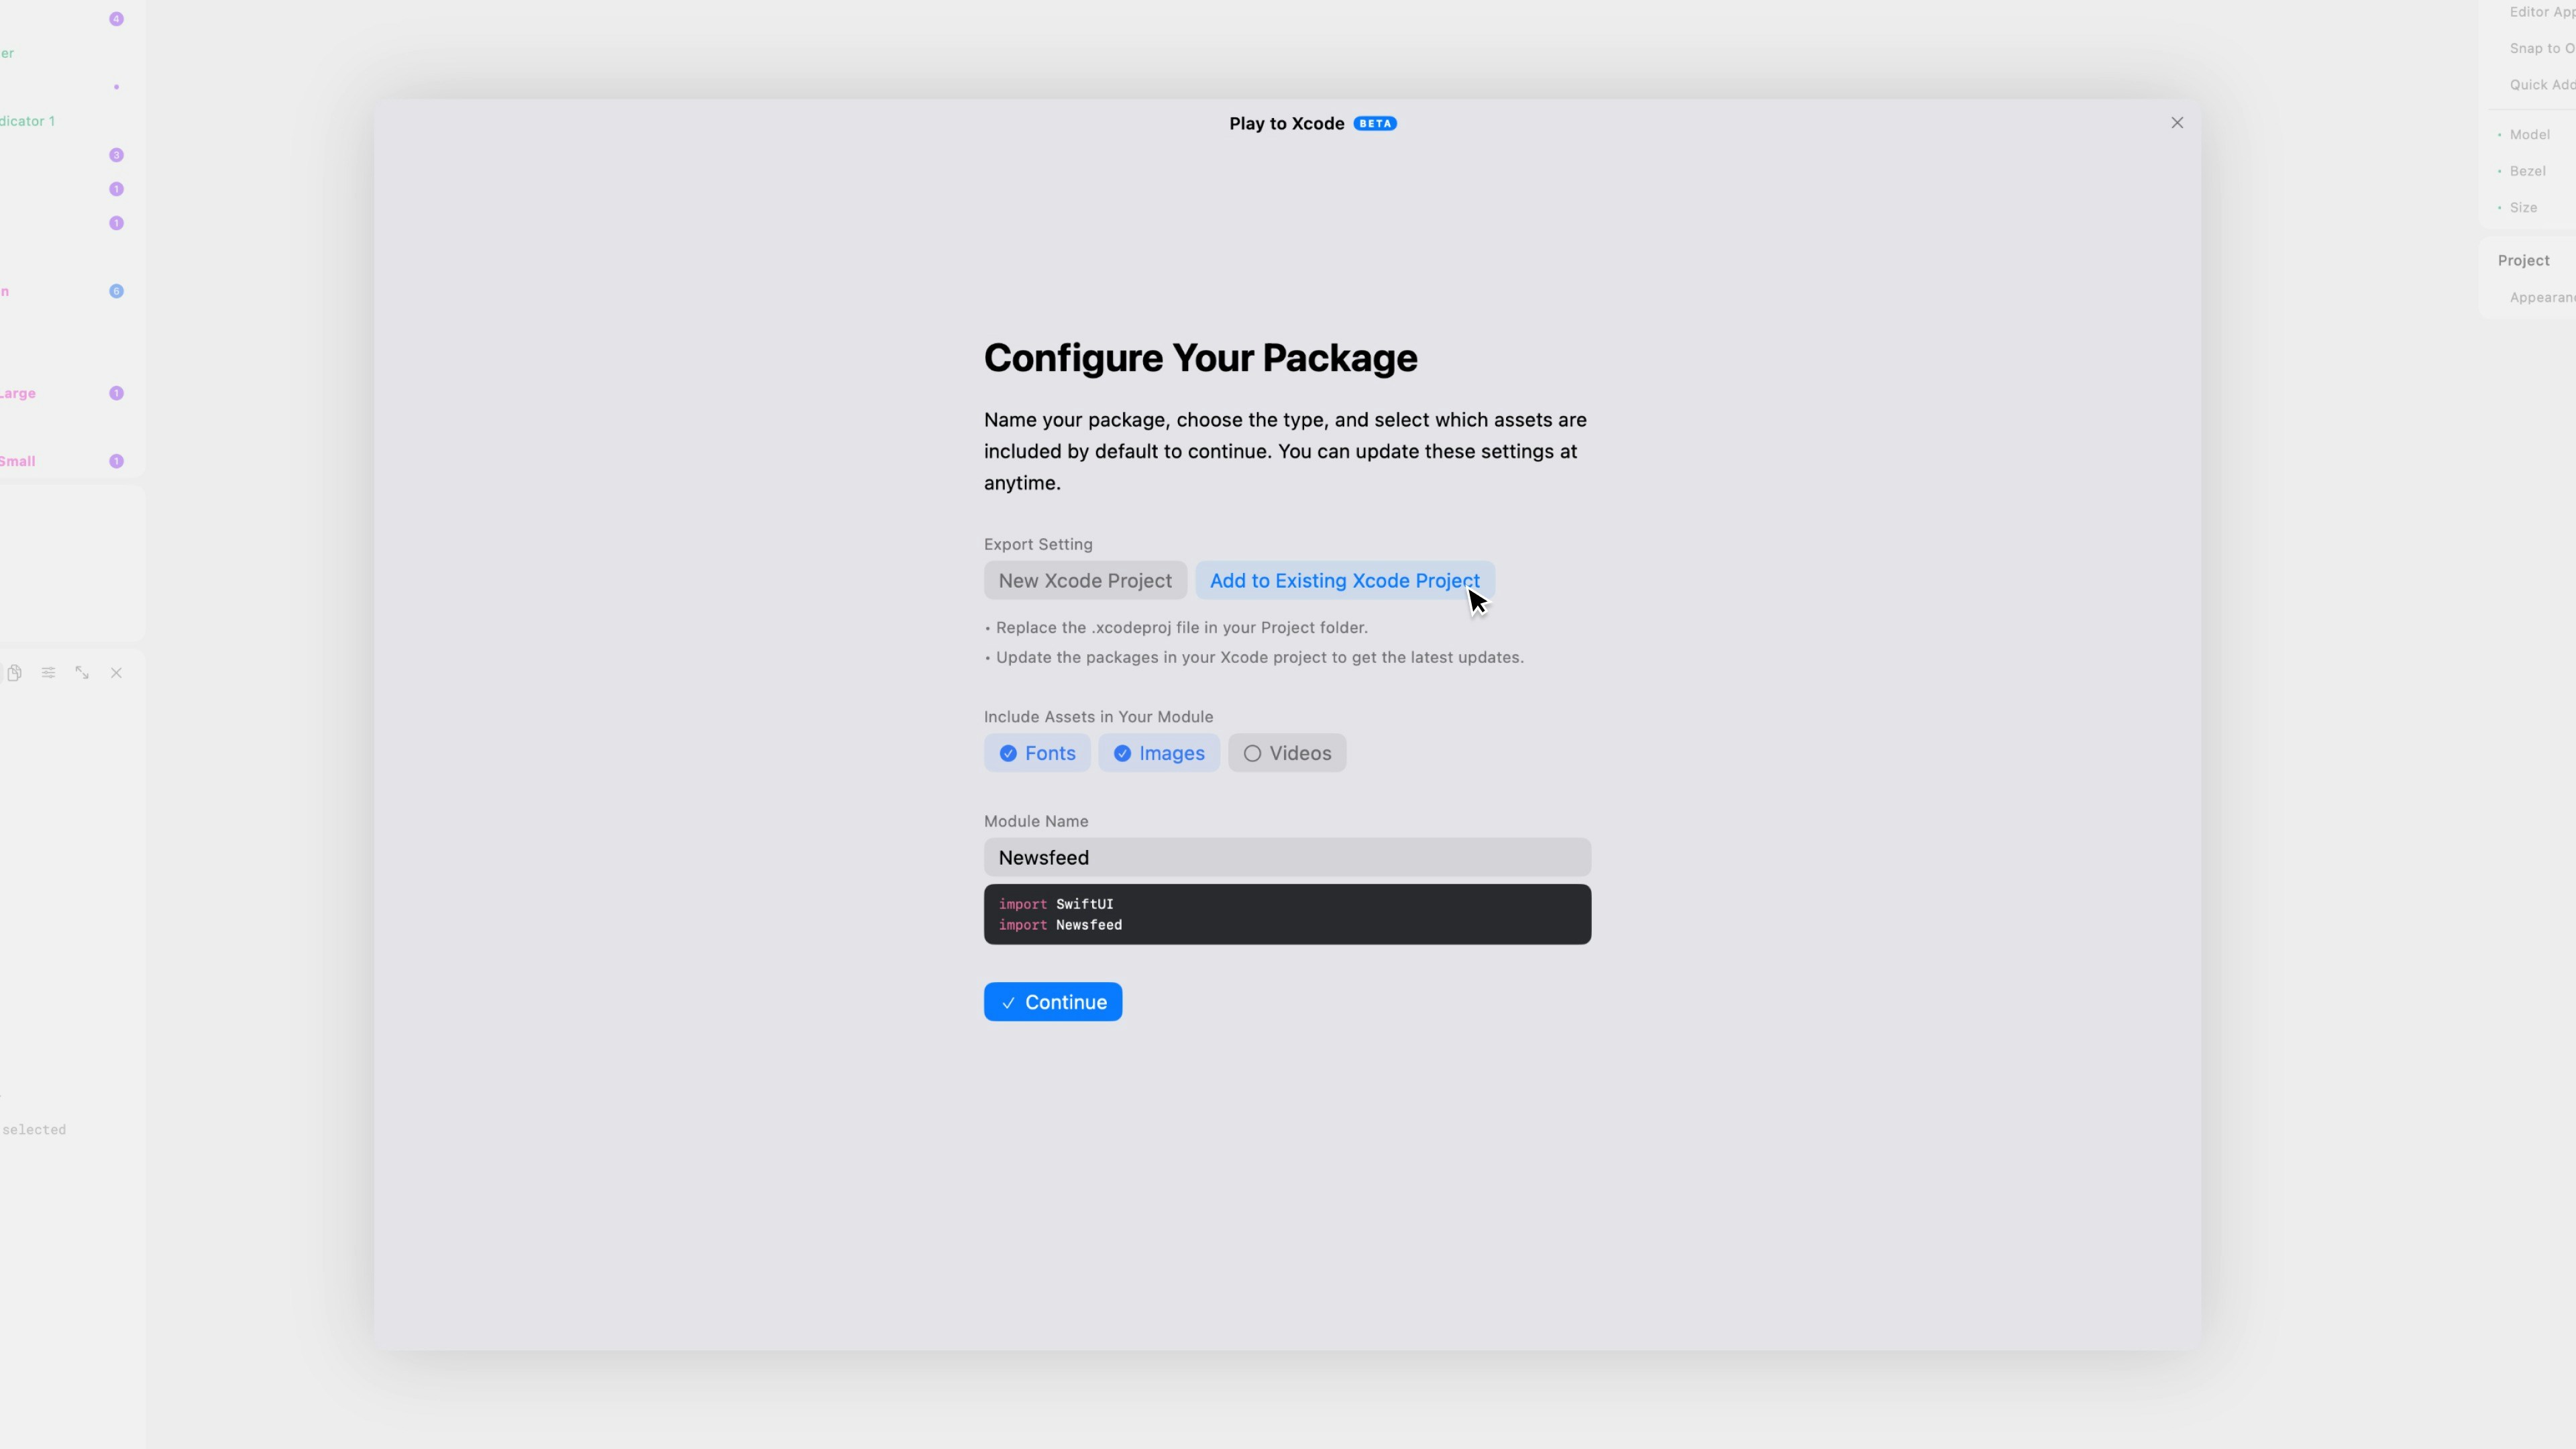
Export As
Select “Add to Existing Xcode Project”.Include Assets in Your Module
Choose to include font, image, and/or video type assets from the Play project. You can choose specific assets later.Module Name
Enter a name for the module. It cannot be the same as the project name. Implement the module in Xcode with the following syntax:Step 2: Review Names and Implementation

Renaming Best Practices
- Class Names should start with an uppercase letter. They cannot start with a number, so we’ve added an underscore (_) when necessary.
- Style and Variable Names should start with a lowercase letter and follow camelCase.
- Slashes (/) cause conflicts, so they should be removed or replaced with an underscore (_).
- Periods (•), Hyphens (-) and Spaces should be removed to simplify naming.
Step 3: Export to Xcode
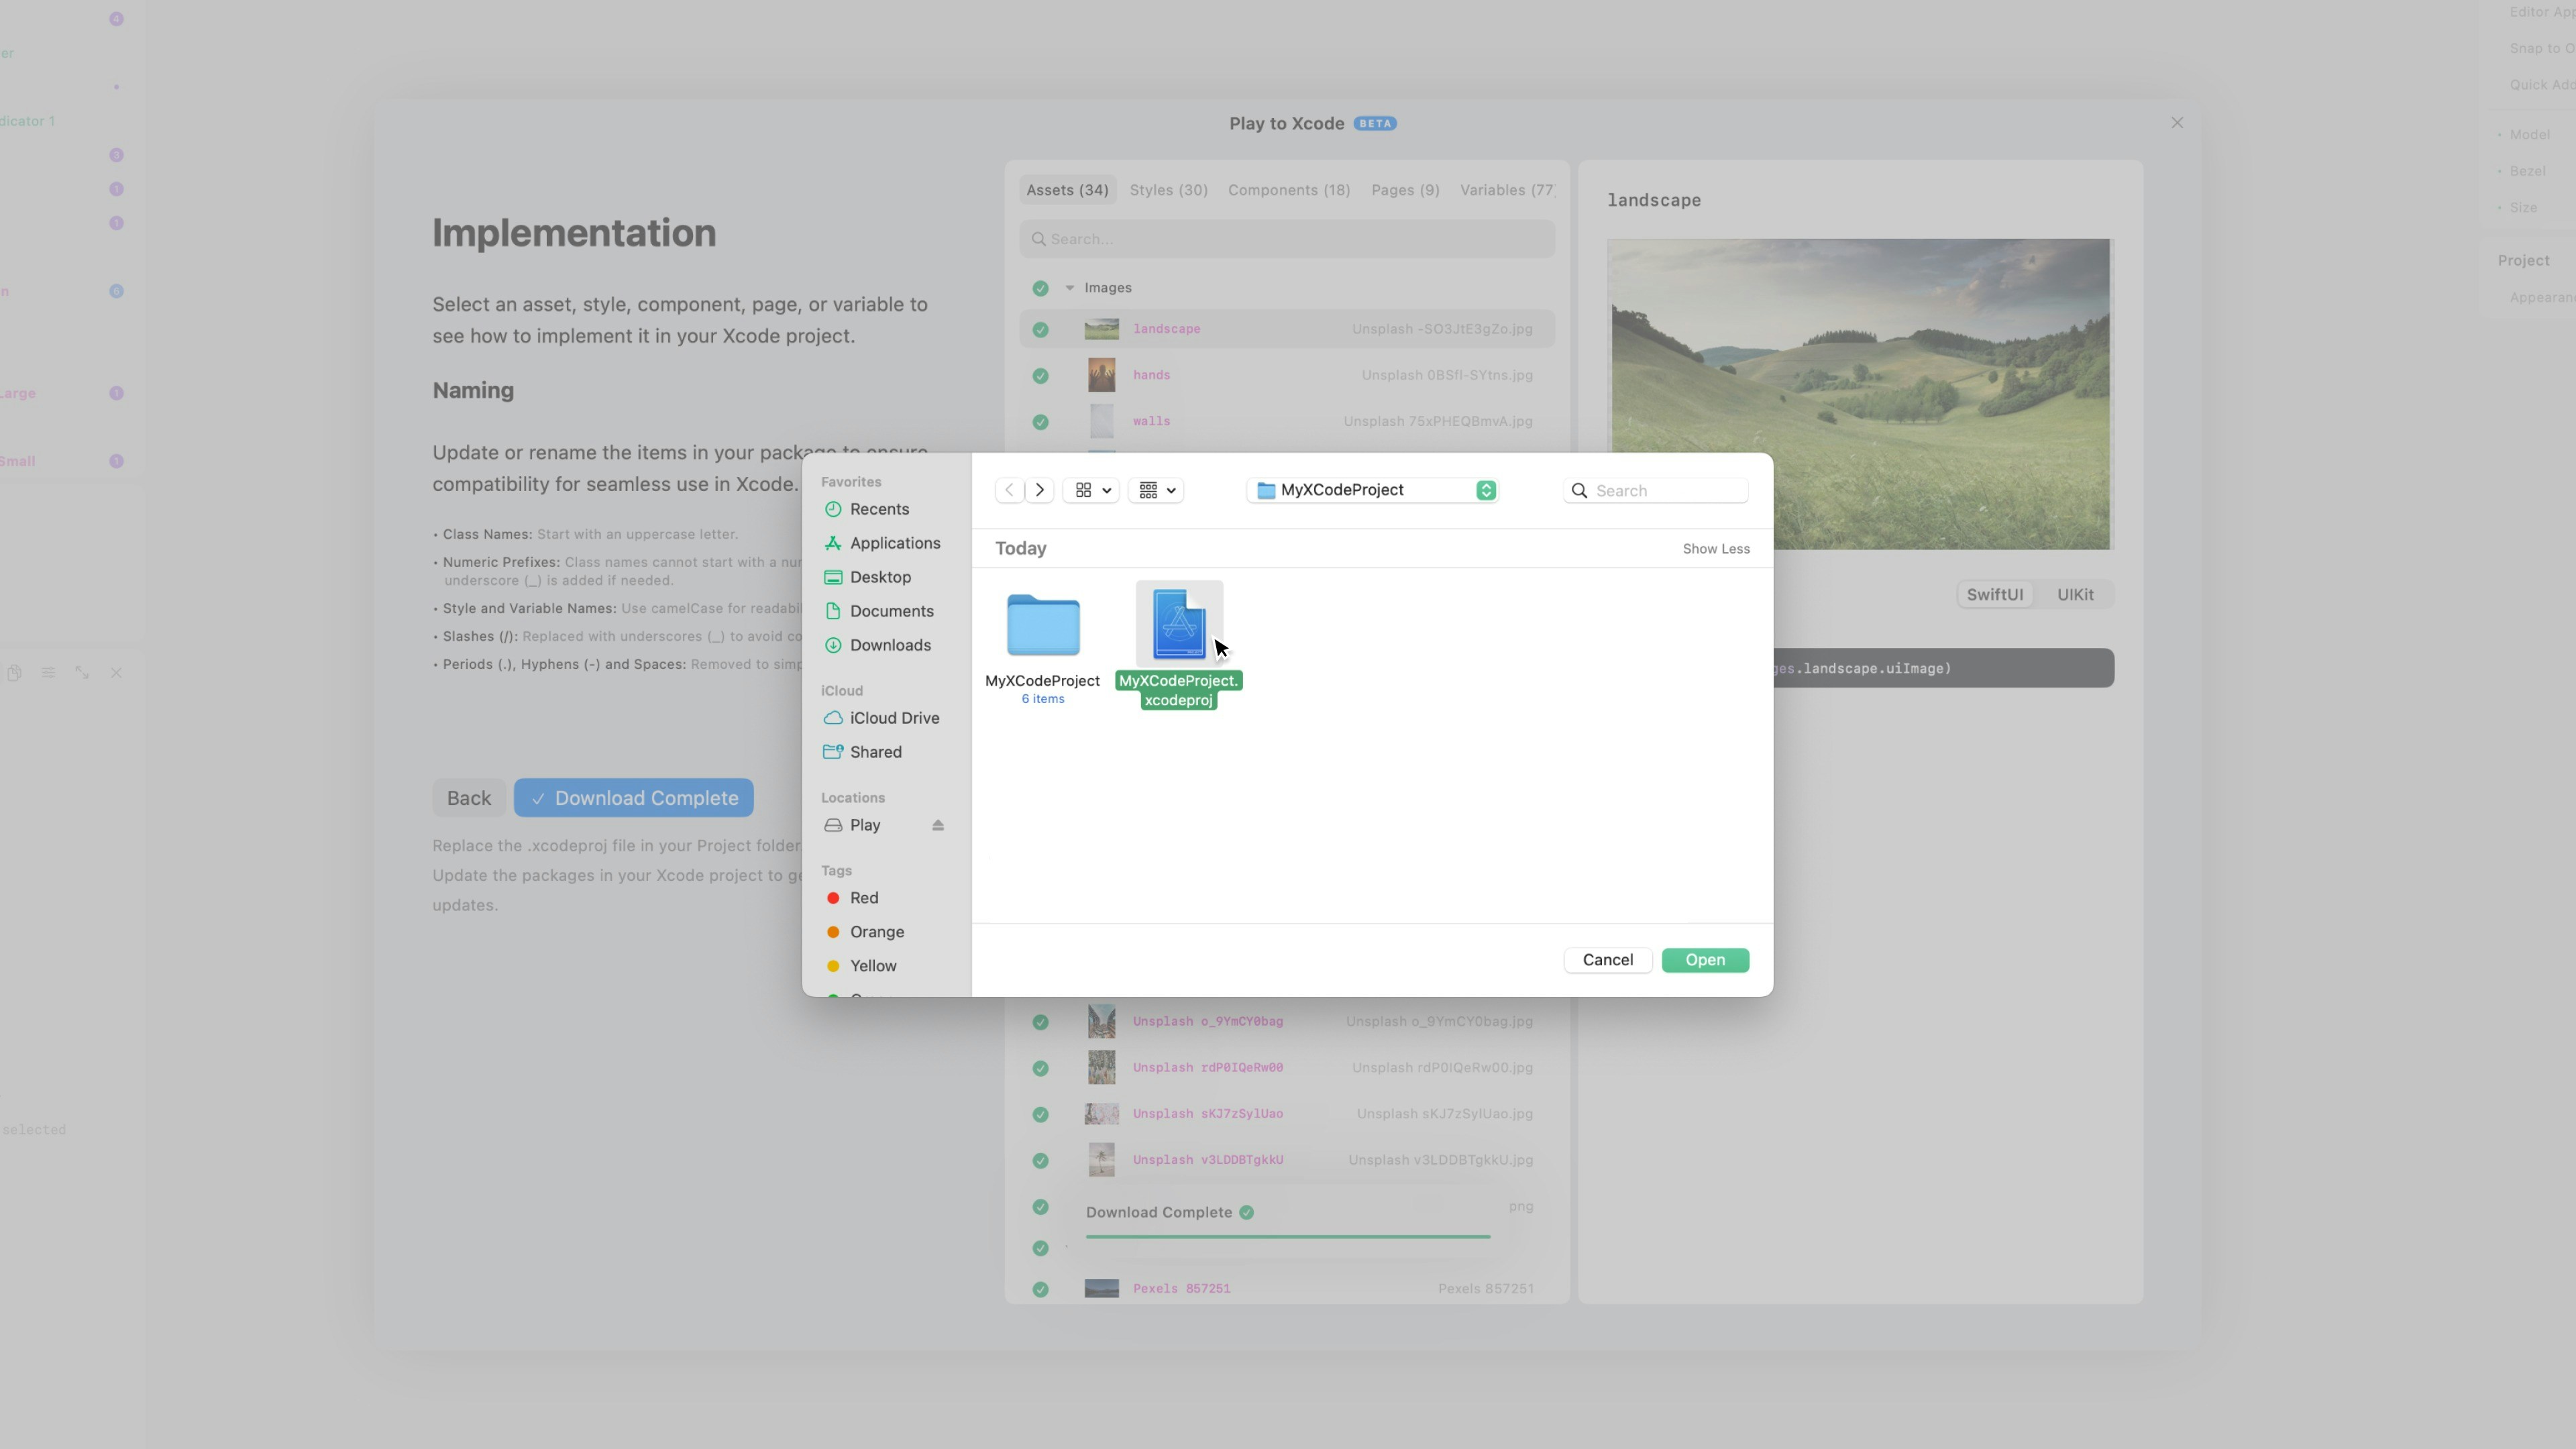
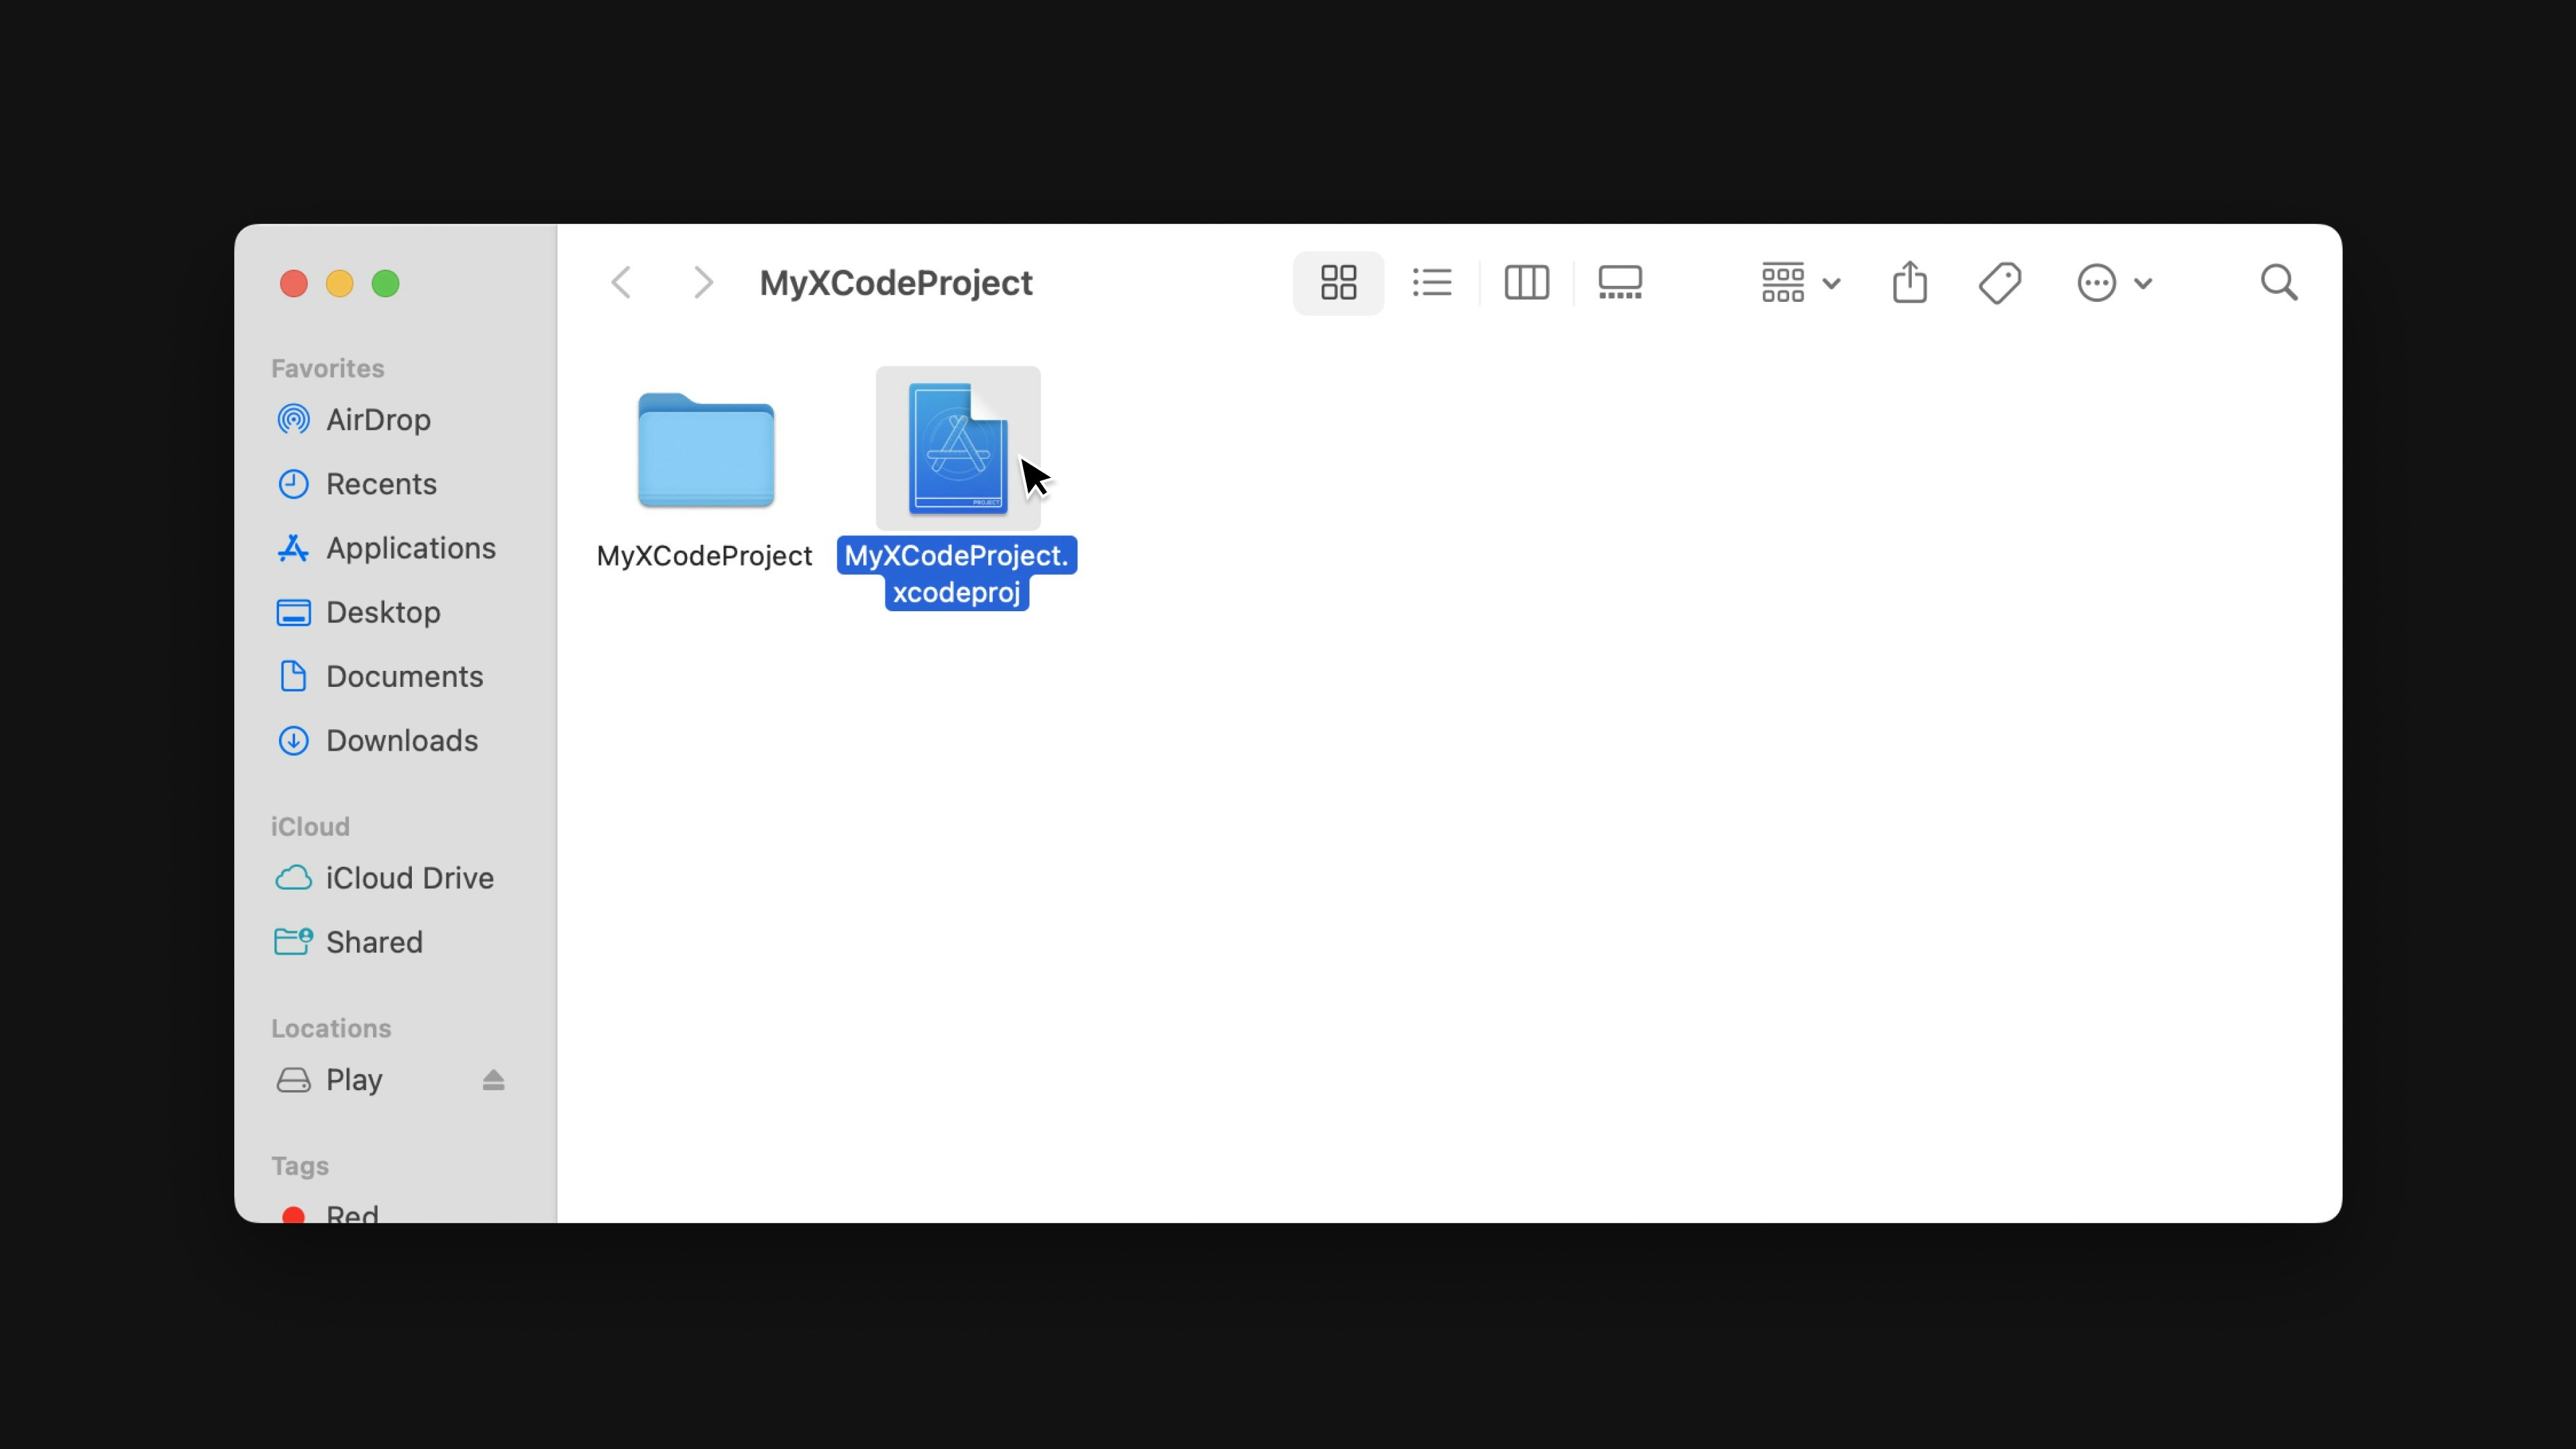
When you’re ready, click “Export to Xcode” to begin the export. You’ll see the download status at the bottom of the macOS app. Select the existing .xcodeproj file to replace. Inside Xcode, update the project the latest package versions from the top menu (File > Packages > Update to Latest Package Versions).